
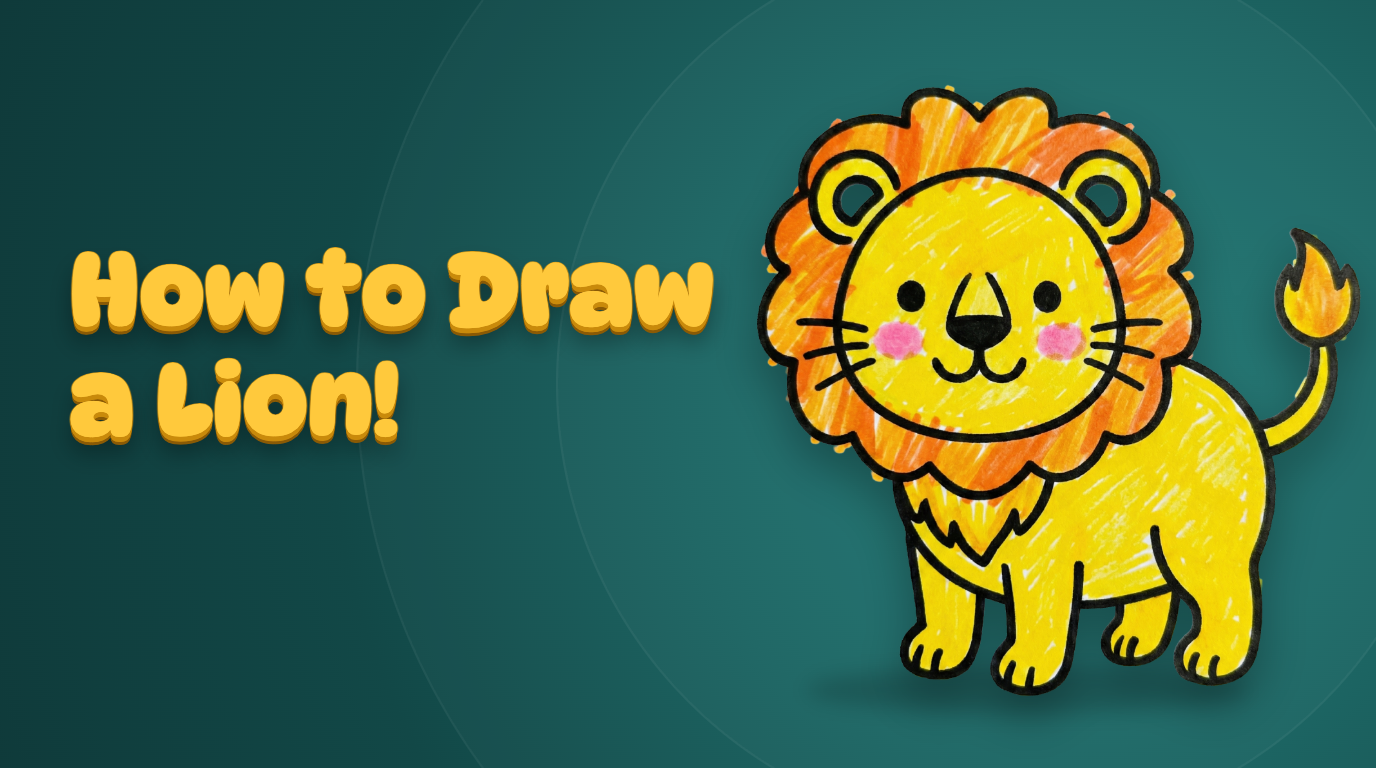
Ask a child to name the most exciting animal in the world and there's a very good chance they'll roar back at you. Lions have everything a young artist loves — a big friendly face, a wild fluffy mane, and a tail with a little tuft on the end like a paintbrush. Best of all, a lion is built almost entirely from circles and ovals, which makes learning how to draw a lion for kids far easier than it looks.
This guide uses the same 6 Simple Steps method we use in every Chunky Badger book. We start with two basic shapes, add a few features, then finish with the fun bits — the mane, the whiskers and all that lovely golden colour. No tracing, no complicated instructions, and no need to be "good at art" to get a lion you'll want to stick on the fridge. 🦁
What You'll Need
- ✏️ A pencil (an HB is perfect)
- 🧹 An eraser
- ✏️ A sharpener
- 🎨 Coloured pencils or felt tips (yellow, orange, brown and black)
- 📄 A sheet of plain paper
That's genuinely it. One of the nicest things about drawing is that the whole kit fits in a pencil case.
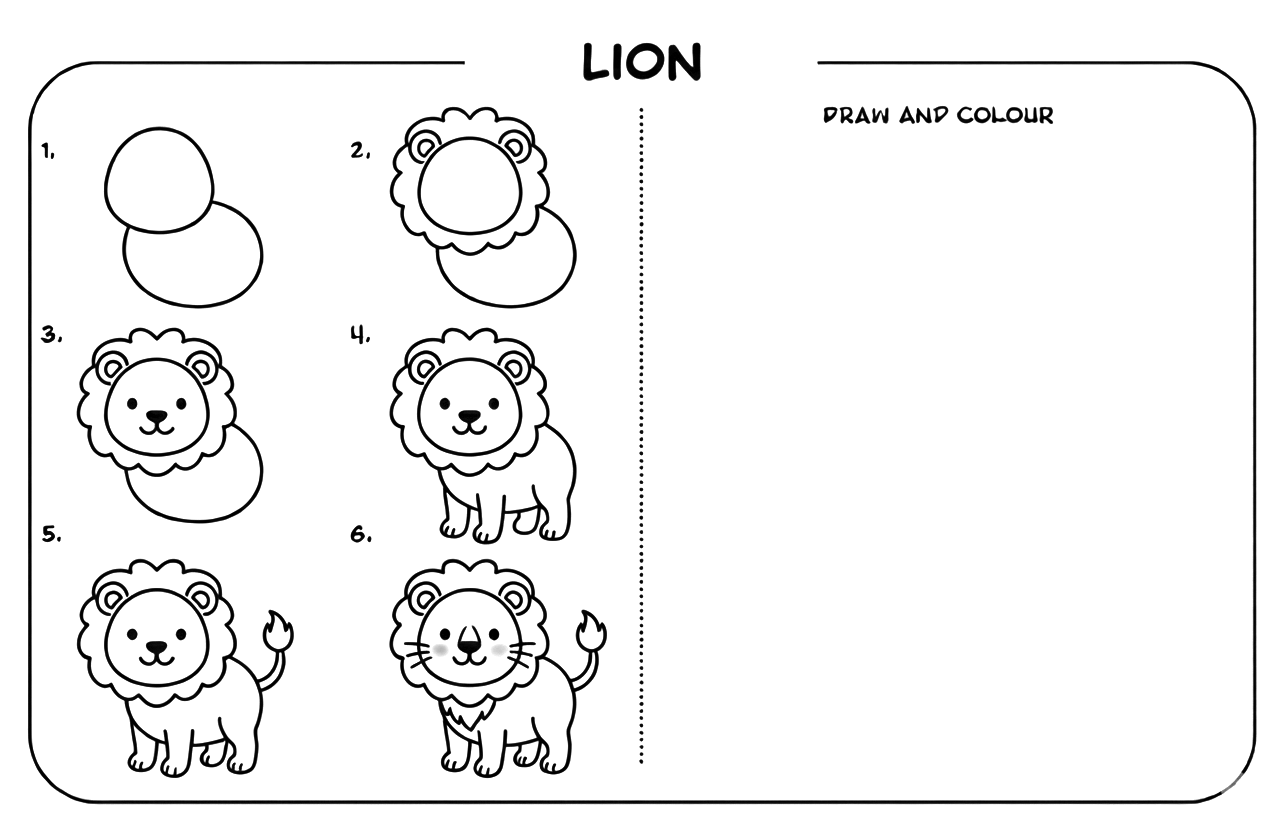
How to Draw a Lion in 6 Simple Steps
Step 1: Draw the Head and Body
Start with a circle near the top of your paper for the head. Just below it and a little to the right, draw a bigger rounded shape for the body, letting the two overlap slightly. That overlap is what stops your lion looking like a snowman.
Step 2: Add the Mane and Ears
Draw a wavy, scalloped ring all the way around the head, like the petals of a big flower. Then add two little ears poking up out of the mane, each with a smaller curve tucked inside. This is the step that turns a cat into a lion.
Step 3: Add the Face
Draw a curved line inside the mane to mark out the face. Then add two round eyes, a small rounded nose in the middle, and a curved mouth underneath shaped like a tiny letter w.
Step 4: Add the Legs
Time to stand your lion up. Draw two front legs coming straight down from under the mane, and two back legs behind them. Finish each one with a soft rounded paw and a couple of little toe lines.
Step 5: Add the Tail
Draw a long curved line sweeping up and out from the back of the body. At the very end, add a pointed tuft shaped a bit like a little flame.
Step 6: Add the Finishing Touches
Last few details and you're done. Add three whiskers on each side of the face, a little zigzag of fluffy fur on the chest, and two soft rosy cheeks. Rub out any guide lines you don't need, go over the lines you're keeping, and your lion is ready to colour.
Your Lion Colouring Guide
- Body: a warm golden amber
- Mane and tail tuft: a deeper orange-brown, darker than the body so it stands out
- Muzzle, chest fluff and inner ears: a soft creamy white
- Nose: black, with a cream muzzle around it
- Eyes: simple black dots — no need for anything fancy
- Cheeks: a touch of soft pink
For an extra-professional finish, colour in the same direction all over — it makes the whole drawing look tidier. And if your child wants a purple lion with spots, let them have a purple lion with spots. Confidence first, realism later.
Well Done, Little Artist! 🎉
You've just drawn a lion from nothing but a couple of circles — that's a real skill, and it gets easier every single time. If your young artist enjoyed this one, try changing just one thing on the next attempt: a bigger mane, a lion lying down, or a whole pride of them across one big sheet of paper. Repetition with small changes is how children build confidence fastest.
Want to explore more drawing tutorials? Try How to Draw a Fox for Kids or How to Draw a Hedgehog for Kids.
Learn to Draw: African Animals
Loved drawing the lion? There are savanna stars, jungle giants and river dwellers waiting inside — every one broken into the same 6 simple steps, with no reading required so children can follow along on their own.
🛒 See the Book on AmazonCloser to home? Our Learn to Draw: British Animals book covers 45+ animals your children can spot in the garden and the woods. Or grab our FREE 5-day drawing pack — 5 British animals delivered to your inbox, one per day. Completely free!